

Intro
When you begin exploring the world of modular synthesis, it’s easy to think only about the weird and wonderful eurorack modules you’ll use to realise your creative vision. That’s totally understandable, as it’s the modules themselves you’ll use to sculpt your masterpieces. There does, however, remain one crucial component which works behind the scenes to facilitate your synth, and that is the power supply.
Powering your eurorack system correctly, and safely, means it will provide you with hours and hours of enjoyment. Powering it incorrectly can, ultimately, be dangerous to you and your prized modules. To help you better understand what’s going on with eurorack power we’ve created this guide. Here, we’ll explain the basic principles of powering a eurorack rig in a way that – hopefully – even non-electrical engineers will understand. It can appear daunting at first to get your head around control voltages and current draws, so we’ll keep the terminology accessible, but by the end, you should have a solid understanding of how to power your eurorack modular synth system.
The basics
Deciding how to power your eurorack system is a bit of a ‘chicken and egg’ dilemma. Each of the different methods of supplying power will allow you to safely operate a finite number of modules, dependent on their current draw. This means the amount of electricity – measured in mA, or milliamps – each module requires to operate safely. So, do you settle on a power system and choose the modules to fit that system, or do you choose the modules you want first and match the current requirements to a suitable power supply? Ultimately, that is a decision you will have to make but regardless of which route you opt for, power does provide a set of parameters in which you will have to work.
Ask anyone with an interest in eurorack and they’ll almost always say to build a foundation – case and power – which gives you room to grow in the future. Plenty have made the mistake of thinking a small system would be enough; there’s a reason why it’s sometimes called eurocrack, after all… While this advice to go larger than you perhaps think refers to the size of the case you’ll work with, the same principle applies to power. It’s better to have extra power available to you and not need it than need more current than your system allows.
Each module will have a specified current draw, i.e. how much power it requires to operate. If trawling through technical information on module brands’ websites doesn’t appeal, then www.modulargrid.com is a hugely useful resource. There, you can plan out your system and the site will tell you the combined power draw for any combination of modules.
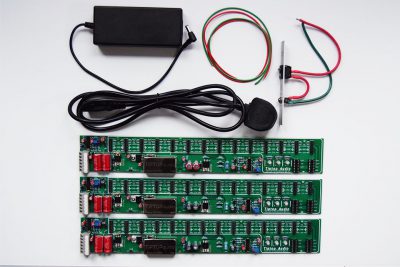
Each module will have a ribbon cable attached to it, which will then be typically connected to a power distribution board, known as a ‘bus board’. The bus board is in turn connected to a power source, which can be in the form of a module, for smaller systems, or a dedicated power supply unit (PSU). Essentially, in basic terms, this power source takes electricity from your mains supply and converts it to a form that is then safely distributed to your modules.
To connect your modules, simply connect the ribbon cable from the module into a spare slot on the bus board. Eurorack modules usually require a +/-12VDC supply, meaning +12VDC and -12VDC source, while a few also require a separate +5VDC source. It’s important to pay attention to the ribbon cable; along one side there will be a red line. This is the -12VDC header and connecting this the wrong way round can significantly damage your modules. Many modules offer some guidance on this, either by indicating on the PCB which direction to connect the ribbon cable, or by having a keyed shroud on the connector which prevents it from being plugged in the wrong way.
Equipment
To power your eurorack you’ll need.
• Power distribution
• Power supply
Power distribution is handled by bus boards these tend to come in two forms; regular bus boards, which place the power connectors onto a long, rectangular PCB, and a ‘flying’ bus boards in which the connectors are joined using ribbon cables. Busboards take the mains power and convert into a suitable form to operate your eurorack modules. To get power into the busboards you will need a power supply unit.
Getting power from the mains and into your eurorack system will likely come in one of four common forms.
1. Mains voltage converted outside the case to a DC voltage via an external laptop-style power brick or wall wart which then feeds into a power unit such as KonstantLab BoardPWR which is sited within the case. This then takes the DC volt and distributes to a passive bus board(s) with the required +12v, -12v and +5vDC. With your eurorack modules installed on the front of your case, you then need only to connect the ribbon cable at the rear to an available slot on your bus board, and you’re good to go.
2. Mains voltage converted outside the case to a DC voltage via an external laptop-style power brick or wall wart, which then feed into a power unit that is mounted as a module in your case. This module then works its magic and feeds the passive busboard(s) with the required +12v, -12v and + 5vDC . This makes for a relatively easy DIY power install as you are not having to cut into the structure of the case to fit a DC jack input socket /switch. Examples of this are TipTop uZeus, KonstantLab StrongPWR.
3. A third variation to the above is where the converted DC power enters the case via a jack socket and switches to feed into the active bus board(s) which does ‘on board’ the conversation to +12v , -12v and +5v to provide the power to the modules via the ribbon cable. Examples of this type of set-up are TipTop Zeus Studio and Intelligel TPS80W. Both TipTop and Intellijel also facilitate the installation of these systems by providing, as an option as a faceplate module which is simply a DC jack socket and switch.
4. The fourth common form is where the mains power is plugged into the case usually via a C14 socket and mains lead (a kettle socket and lead) and the voltage is transformed from mains 240/110v to the required dc voltage and then distributed to the busboard(s) the required +12v, -12v and +5v. Because you are dealing with mains power within the case it makes it less suitable for DIY installs and needs to be carried out by a suitably competent person with extra caution to guard the mains power elements of the system. Doepfer PSU3 is a good example of this form of eurorack power that is installed in a multitude of eurorack cases.
I think it is worth saying at this point that different manufacturers and systems require different DC voltage to come from the power bricks. Some systems operate on 12v DC going into the case others 13v, 15vDC, 18vDC or 20vDC and just to complicate things further the rating of the power brick given as amps or watts will also differ. It is therefore important to take note of the recommendations of the various manufactures to get the best performance from their system.
All variations have limits on the amount of power they can distribute successfully and safely, so it’s important to check the current draw of your modules is within these limits.

A worked example
To provide a bit of context, it would perhaps be useful to see an example of the thought process, equipment and constraints of an actual system; my system!
My Monstrous Eurorack is the rig I’m using currently, and a good one to demonstrate the principles we’ve talked about in this article. In it, you’ll see I’m using an 84 HP case with three available 3U rows for eurorack modules.
The case is powered by Konstant Labs μZDROJ 4HP power supply module, which connects to the mains via a 60W laptop style power brick. A ribbon connector links up the power module with a single bus board covering two rows of modules. The μZDROJ can safely deliver 2000mA (+12VDC), 500mA (-12VDC) and 1500mA (+5VDC) when receiving an 18V input from the power brick.
The modules in my system draw a total current of 1272mA (+12VDC), and 508mA (-12VDC) so I’m pushing the upper limits of what can be drawn from this system but, for now, it works just fine.
Modular Grid is a Eurorack builder’s best friend here, as it enabled me to see what power I’d require and then match those requirements to the power system I installed. It also gives me information as to what my future requirements might look like once my module collection grows, so I can plan – and power up – accordingly.
Conclusion
While it may not be as glamourous as choosing your next space reverb, or fancy envelope generator, a solid and reliable source of power is as essential to any eurorack system as the modules it will bring to life. Whether you’re planning a new system from scratch, or looking for ways to add to an existing setup, take the time to make sure the power you need is available to you using your chosen methods.
Ideally, we all want to choose a power supply and distribution method that means we never have to worry about it again, and with a bit of careful planning, you can do just that.